This is my favourite way to make a mug rug as there is no need to quilt it at the end.
You will need:
Backing fabric 11 x 9 inches
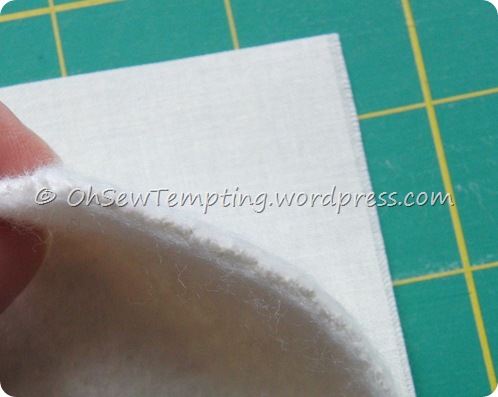
Wadding 11 x 9 inches (you may wish to use heat resistant wadding but do not use polyester wadding as it will melt onto your iron)
Five strips 8 x 2.5 inches
Binding 48 x 2.25 inches, folded and pressed in half with wrong sides facing.

Lay the wadding on top of the backing fabric.

Position the first strip, right side up, about one quarter of an inch from the right
hand edge.

Sew in place using a quarter inch seam through all three layers.

Turn the work so that the strip is positioned to the left.

Lay the next strip on top of the previous strip with right sides facing.

Sew a quarter inch seam through all layers down the right hand side of
the strip.

Lift the second strip and press towards the right.

Like this.

Place the third strip on top of the second strip with right sides facing.

Sew a quarter inch seam through all layers down the right hand side of
the strip.

Lift the new strip and press to the right.

Continue until all five strips are attached. Then sew down the right hand
side of the final strip.

Then sew along the top and bottom and trim all the way round to make a
rectangle.

Line up the raw edges of the folded binding strip with the edge of the mug rug.
Leave about 3 inches before starting to sew a quarter inch seam down the side.

Stop sewing one quarter of an inch before the first corner.

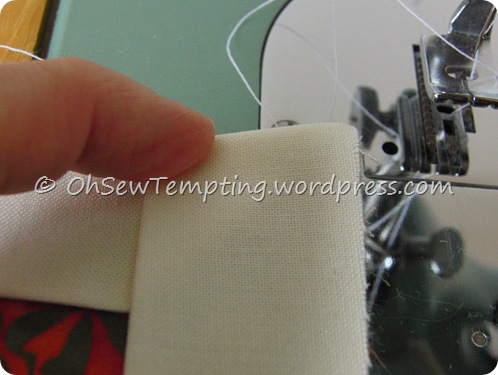
Pull the work away from the needle area of the machine. There is no need to
cut the threads. Turn the work to this position.

Lift the binding and finger press in this position. The fold should make a
45 degree angle and the raw edge should be in line with the right hand side
of the work.

Keeping the fold in place, bring the binding down in line with the next raw
edge of the work.

Continue to sew from the very edge of the work to the next corner and
repeat until all four corners are done. Stop sewing about three inches
before the finish.

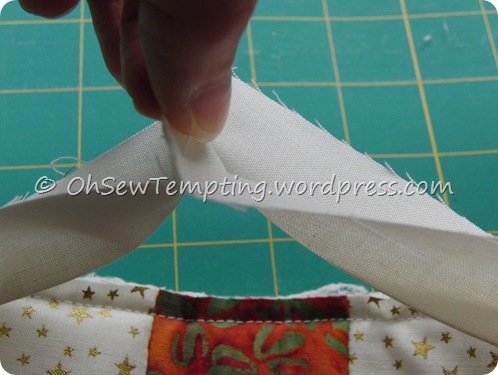
Overlap the ends of the binding strip and cut so there is a half inch overlap.

This bit is quite tricky! Sew the ends of the binding, right sides together,
using a quarter inch seam.

Finger press the seam open then continue to sew the rest of the binding
to the mug rug. Turn the binding towards the back of the work.

Hand stitch the binding to the back, folding to make the mitred corners.

Ta-da!

Just testing ![]()

I’ve also made table runners, toppers, cushion fronts and place mats using
the ”Quilt as you go” method. It also works well for small jelly roll strip quilts.
If you want some extra challenge….use diagonal strips, maybe of different
widths.


mtetar
/ May 21, 2013Very Nice Avis x, and Great Tutorial! The display has me thinking of trying to make one. Happy Belated Birthday to your friend and I’m sure she’s will like her gift. Be Blessed, Mtetar
Oh Sew Tempting
/ May 21, 2013Thank you Mtetar! I hope she likes it 🙂 Avis x
mtetar
/ May 21, 2013You’re welcome Avis x! Be Blessed, Mtetar
Teje
/ May 21, 2013Good morning Avis! Great, simple and beautiful mug rug! I think it’s time to make one for my mug! Have a wonderful day! x Teje
Oh Sew Tempting
/ May 21, 2013Hi Teje! I had a lot of fun sewing this. Have a great day! Avis x
claire93
/ May 21, 2013gorgeous mug rug
and you make it so easy I’m going to have to give this a go
Oh Sew Tempting
/ May 21, 2013Great! I hope you enjoy making it 🙂
claire93
/ May 21, 2013have to tackle my squares first lol but yep this one is on my “to do” list
Patch
/ May 21, 2013Ooooohhh, looks good Avis. Might have a go at this when I get chance to get back to the sewing machine.
Oh Sew Tempting
/ May 21, 2013It’s really easy and quick to do 🙂 I look forward to seeing the results.
witchylin
/ May 21, 2013Hey Avis, That is really cute and looks sew simple when you do it. I think I will have to make some and perhaps place mats in the same design. Love the batik fabric.too. Great tutorial, it answers every question I could have. Thank you for sharing. I am sure your friend will love it. Hand made gifts are so special.
Oh Sew Tempting
/ May 21, 2013Hi Lin, I just thought of a quick way to make several….just make the strips longer and sew a long strippy quilt. Then chop it up into individual mats. Sew along the top and bottom of each and bind. I agree, handmade gifts are great 🙂
witchylin
/ May 21, 2013Oh! WOW. I had no idea I was to be the lucky recipient of the gorgeous mug rug. I wondered just what the package could be when the postman arrived about an hour ago. Thank you so much it is really lovely. I’ve emailed you a “trying it out” picture. I want everyone to know it looks even better on my table than in the pictures. Thank you so very, very much. You’ve made me feel all warm and fuzzy. 🙂
Oh Sew Tempting
/ May 21, 2013He-he! That was fun 😉 I was hoping you wouldn’t see this post until after the mail had arrived. When I saw your comment this morning I thought he-he she doesn’t suspect. I’m so pleased you like it! It’s always nice when people appreciate handmade things 😀 Avis x
Gail
/ May 21, 2013Thank you so much, Avis, as always you are so inspiring. I’ll definitely try this especially your idea of how to make several mats quickly.
Oh Sew Tempting
/ May 21, 2013Hi Gail, Well if you do make some, send me an email with a photo (address on the right) and I’ll share it with everyone 🙂 I’m now thinking I might do several Christmas table runners all in one go for presents….so many ideas, so little time. Christmas! Who said that!!!
cathdragon
/ May 21, 2013ohhhh very beautiful ! I love it ! cath
Oh Sew Tempting
/ May 21, 2013Thank you Cath 🙂 xx
minerva
/ May 21, 2013Lovely! I have some fabric just waiting to be used for something like this. I must give it a go!
Oh Sew Tempting
/ May 21, 2013Go for it! I really enjoyed making this one 🙂
rutigt
/ May 21, 2013Nice!!! I´ll bookmark this tutorial 🙂 That means I´m gonna sew it in the future!
Gun, Sweden
Oh Sew Tempting
/ May 21, 2013Yey! That makes me happy 🙂 Thank you! Avis x
Janie Kemp
/ May 21, 2013Thank you for this great tutorial! Your clear text and detailed photos are very helpful. :o)
Oh Sew Tempting
/ May 21, 2013You are very welcome Janie. I hope you can make use of it 🙂 Avis x
Janie Kemp
/ May 21, 2013It may seem small to you, but the way you close the binding appeals to me. I’ve had so much bulk with the method I’ve been using. Looking forward to this.
Oh Sew Tempting
/ May 21, 2013If you mean joining the two ends together…..I’ll have the quilt police after me for that! You are supposed to cut them diagonally but for such a small mat, I didn’t see the point and this way works fine because it is fiddly enough. I love to break the rules now and again 😉
Janie Kemp
/ May 21, 2013Me too! I won’t tell if you don’t!
Oh Sew Tempting
/ May 21, 2013Sneaking away on tip-toes 😆
jule
/ May 21, 2013Fantabulous! How did you know I have a leftover piece of wadding just about this size? Next two weeks = holidays = all kinds of crafting. 🙂
When working with sticky stuff I always use a sheet of baking paper to protect my iron. Have you tried this?
Oh Sew Tempting
/ May 21, 2013No, I haven’t tried that. You are a genius! I could have saved several irons if I’d known you before. On one occasion I was too lazy to get the ironing board out for a T-shirt. So I ironed it on the floor at the top of the stairs. No-one told me it was a nylon carpet, did they 😆
jule
/ May 22, 2013Poor carpet! 😦 You could also save the paper fusible web comes on and reuse it. Works as well.
Oh Sew Tempting
/ May 22, 2013We laughed about it later. Thank you for the tips 🙂
Sew Rosey
/ July 7, 2013Hi Avis, what a clever idea, I will have to make some of these, great pressies and really easy to post. Thanks for sharing. 🙂 Debbierose
Oh Sew Tempting
/ July 11, 2013Thank you. I found the method for a table runner on YouTube by the Misourri Star Quilt Company. I made Christmas table runners and just adapted the size for this.
Judy @ NewEnglandGardenAndThread
/ July 16, 2016Thank you for the tutorials. One question – what is the gadget that allows you to measure 1 1/4″ from a seam? Where can I buy one? 🙂
Oh Sew Tempting
/ July 17, 2016Hi Judy, If you mean the sewing foot on the machine….it’s just one of the feet that came with my old machine. I tried several feet from the accessories and kept the edge of the fabric to the right hand edge of the foot as I sewed. I then measured how far the sewing line was from the edge of the fabric and settled for this one because it gave a perfect quarter inch. You can actually buy special quarter inch feet for patchwork but why have the expense when you probably already have one that will do the job? I hope this is the answer to your question 🙂
Judy @ NewEnglandGardenAndThread
/ July 17, 2016I have a 1/4″ foot that works okay. The thing I’m talking about is the thin silver arm type thing that you were measuring 1 1/4″ from the previous quilting line. It looks like a piece I have on my quilting foot but mine doesn’t stay in one place to use. Thanks.
Oh Sew Tempting
/ July 17, 2016I’ve sent you an email with a couple of photos which might end up in your spam box. I insert the rod into a universal foot grabber. I hope you have one that works.
Kay williamson
/ April 28, 2017Just started to do quilting and this is really helpful, Thankyou.
Oh Sew Tempting
/ April 28, 2017Welcome to my blog 🙂 I hope you enjoy quilting. I’ve also used this method to make table runners for Christmas. I used some of the decorative stitches on my machine to add more detail after the strips were all together. Have fun!